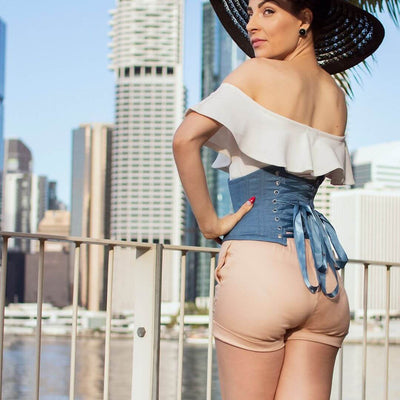
A Corset Story Guide on how to put on and lace your corset
How to put on your corset
Your Corsets from Corset Story will arrive already laced and the long lacing loop will be tied in a loose bow. This means you will not have to lace your Corset, as we have already taken care of that for you!
Lay one of your Corsets on a flat surface, with the lacing panel facing upwards. You will notice the laces are pulled together and the long length of lacing loop is in the central waist area of the Corset. Lacing a Corset in this way, allows for the majority of the tension to run through the waist of the Corset, which is the strongest part of the garment.
We have all seen films and period dramas which show the Corset wearer being laced into their garment by someone standing behind them, pulling hard on the laces and always working from the top of the Corset downwards.
Lacing a Corset is such a way, is no longer an effective method. Not only is it no longer practical to have someone lace you into your Corset, the tension would be in the wrong area!
Having the long length of lacing loop in the central waist area not only helps displace the tension evenly throughout the Corset, it also make it easier to put on the Corset by yourself!
Yes, you read that correctly…putting on your corset by yourself!
The saying Practice, makes Perfect is true and you will find that after only a couple of tries that tying your Corset gets easier and easier.
Before we start with our step by step “How to guide”, please remember when putting on your Corset, it is very important that you always fully loosen the laces as this will make it easier to fasten, while reducing additional strain on the busk.
Here is our step by step guide to putting on your Corset.
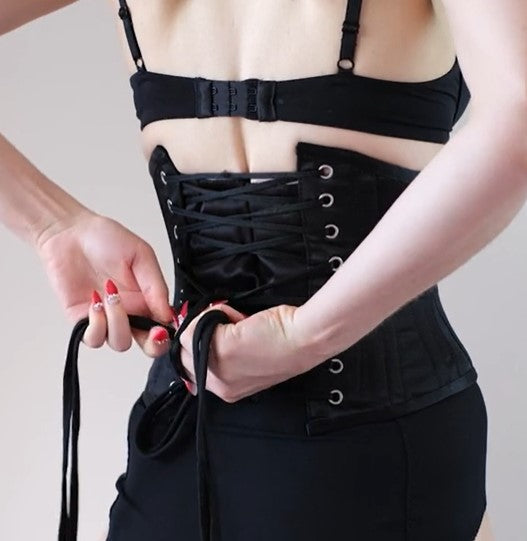
1) Looking at the back of your Corset, untie the bow and fully loosen the laces
2) Lay the modesty panel flat behind the loose lacing


3) Stand in front of mirror that is long enough to see your torso
4) Wrap the Corset around your back and bring the 2 front panels towards each other
5) Try to fasten the busk as one piece rather than working hook by hook as this can damage the busk
6) Fastening the busks is a tricky stage, so do take your time - starting with busks closer to the waist will help


7) Once the busks are fastened, take a moment to adjust the modesty panel to keep it in place
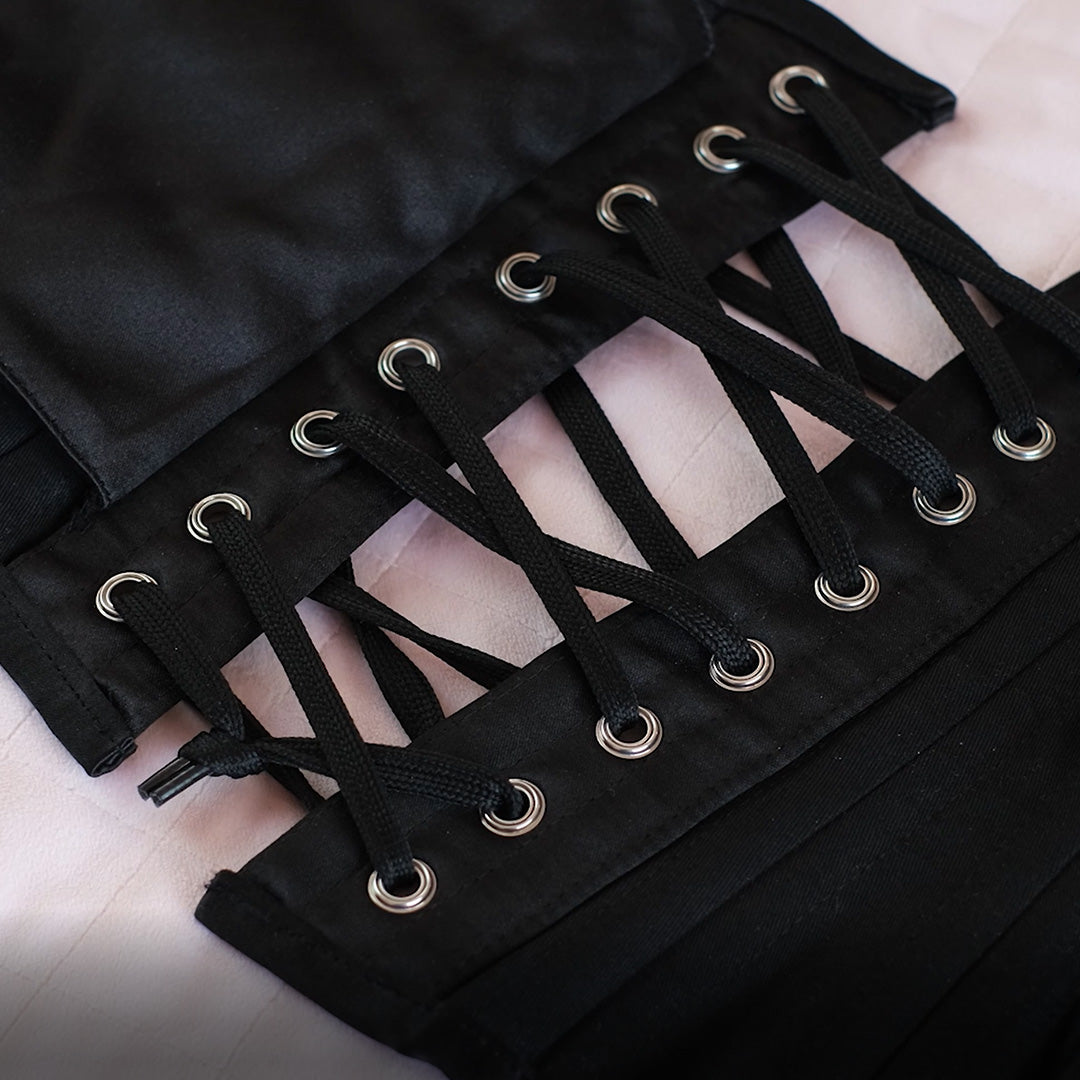
8) To tighten your Corset pull the long length of lace out to the side, away from your body (using mirror to make it easier to see), this will draw the edges of the Corset closer together
9) You will need to repeat this lace pulling action several times until your Corset is tighten
10) Remember not to over tighten your Corset, you should have a lacing gap of 2-3 inches
11) The last step is to tie a bow with the long length of lace

We always recommend a lacing gap of 2-3 inches as this will allow you to season your Corset and for your Corset to be the most comfortable fit.
If you would like more information, please read out Blog How to Season Your Corset
We understand this can all be rather tricky so, remember Practice, makes Perfect and for more info on our top tips please watch the video below.
Other Top Tips and Lacing Hints
Our first and most important tip is to wear a Corset Liner with your Corset, this creates a protective barrier between your skin and the Corset.
A Corset Liner will prevent any sweat, fake tan, or moisturisers on your skin from coming into contact with the fabric of the garment. Our Corset Liners are made with 75% Natural Bamboo and Spandex, which has a super soft touch as well as sweat-wicking and antibacterial properties. Even better, it can be machine washed after use. A win-win for you and your Corset. You can purchase our Tube Liners via our online store.
If you do not have a Corset liner we would recommend wearing a cotton vest or t-shirt.
You might be tempted to wrap the long length of lace around your waist until you have a smaller amount to tie. Doing this will over tighten your Corset and can damage the boning. The steel bones need time to season, we promise it will be worth the wait!
Re-Lacing a Corset
You may wish to change the lace in your Corset from Ribbon lacing to Cord lacing and we are on hand with a helpful step by step “How to guide”
When re-lacing a Corset make sure to give yourself plenty of room to work, as a lace is roughly 8 meters in length. We would recommend laying your Corset flat on a table or counter top, as this is good working height. We would also suggest, taking a photo of the lacing before you start, so you have a reference to look at as you work.
1) Untie the central bow and fully loosen the laces and place the central long lengths of lace on either side of the Corset.
2) Make a note of which eyelet holes are used for the long looped lengths of lace – this should be where the waist tape is positioned
3) Undo the small knot in the very bottom of the lace, at the base of the Corset
4) Pull the lace through each eyelet hole, working upwards – until all the lace has been removed
5) Ensure your 2 Corset sides are kept in parrel, so each eyelet hole is level
6) Take to 2 ends of your new lace and thread each end through the top eyelet, working from the outside to the inside of the Corset – one end on the left side and one end on the right side
7) Pull all the lace through and this will give you a straight top lace, with the lace now sitting on the outside
8) Take an moment to make sure your lace is even in length - you now need to start creating your X in the lace
9) The first X can be tricky, take your time and it will work!
10) Take one lace end and place it into the eyelet on opposite side – working from the inside out.
11) Still working with the same lace end – thread it across and down one eyelet – working outside to inside
12) Repeat steps 11 & 12 with the other end of your lace
13) You should now have your first X lace
14) Continue to make X laces until you reach the waist tape area – as we now need to create the long length of lacing loops
15) Thread the lace into the next eyelet down - on the same side
16) Repeat this step so that both your left and right side of your Corset now have a loop
17) Continue working down the Corset making X lacing until you reach the last 2 eyelets
18) Tie a small know in the end of your lacing
19) Now pull the lace through the eyelets until you have an even length of loop on both left and right sides
Featured Products
Our customer service team has a wealth of knowledge, so please do get in contact if you have any questions or queries, we are always happy to help.
Blog Author - Kerry-Sue Peplow